


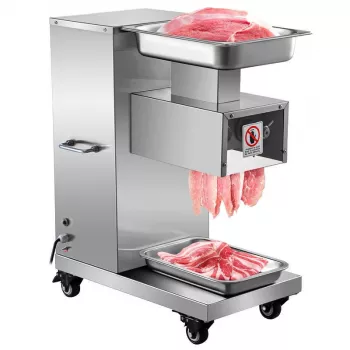
750W Electric Meat Slicer: Fast, Even Deli-Style Cuts

750W Electric Meat Slicer for Fast, Even Cuts at Home or in a Small Kitchen
A powerful electric meat slicer can turn roasts, deli-style meats, cheese, and vegetables into consistent slices in a fraction of the time it takes by hand. With a 750W motor, you get steadier cutting speed when foods are dense, chilled, or slightly firm—exactly the conditions that usually produce the cleanest slices. This guide covers what to look for, how to use a 750W slicer safely, and how to keep it performing smoothly.
What a 750W Electric Meat Slicer Is Best At
A 750W electric slicer shines when speed and consistency matter more than “occasional” use. The extra power helps the blade keep momentum instead of bogging down mid-cut.
- Consistent slice thickness for sandwiches, charcuterie boards, and meal prep
- Handling firmer foods that can be difficult with lower-power units (semi-frozen meats, aged cheeses, dense vegetables)
- Reducing waste by producing uniform slices that cook and portion evenly
- Supporting frequent use when paired with proper cleaning and blade care
If the goal is tidy stacks of turkey, roast beef, or cheese with repeatable thickness, a higher-wattage slicer helps deliver that “deli counter” feel at home—especially when food is well-chilled.
Key Parts and Features That Matter
Wattage is only one piece of the puzzle. The parts that guide the food and stabilize the machine are what turn raw power into smooth, even cuts.
- Motor power (750W): Helps maintain speed under load and supports longer slicing sessions.
- Blade diameter and type: Larger blades increase cutting surface; serrated vs. smooth affects bread, tomatoes, and cured meats.
- Slice thickness control: Look for a stable adjustment dial or lever with repeatable settings.
- Food carriage and pusher: Keeps hands away from the blade and improves control on small end pieces.
- Base stability: Non-slip feet and a sturdy body reduce chatter and uneven cuts.
- Safety details: Blade guard, power switch placement, and a clear path for the carriage.
For deli-thin slicing, the thickness control and blade sharpness matter just as much as wattage. A sharp blade paired with a firm, chilled piece of meat will typically outperform a dull blade on a stronger motor.
Quick Specs and Use-Case Fit
A 750W slicer is a great match for batch prep and foods that benefit from colder slicing. For cleaner edges, chill roasts or blocks of cheese before you start. If you’re switching between meats, cheese, and vegetables, keep a damp cloth and a dry towel nearby to wipe surfaces between batches (with the machine unplugged).
- Use the slicer’s power for batch prep: cook once, slice for the week (turkey, roast beef, ham).
- Chill foods before slicing for cleaner edges and less crumbling.
- Match blade style to food: smooth blades excel on meats and cheese; serrated helps with crusty bread.
Typical Tasks and Setup Tips for a 750W Electric Meat Slicer
| Task | Food Temperature | Thickness Range | Practical Tip |
|---|---|---|---|
| Deli-style sandwich meat | Well-chilled | Thin to medium | Slice in short batches and re-chill if the meat softens |
| Roast beef for meal prep | Chilled or slightly firm | Medium | Trim uneven edges first for smoother carriage travel |
| Hard or semi-hard cheese | Cold | Thin to medium | Wipe the blade occasionally to prevent sticking |
| Vegetables (cabbage, cucumbers, onions) | Cool and dry | Thin to thick | Use the pusher for small pieces; keep fingers off the carriage edge |
| Semi-frozen meats | Partially frozen (firm, not solid) | Very thin to thin | Let the blade do the work—avoid forcing the carriage |
Safe Setup and Slicing Technique
Most slicer mishaps come from rushing setup or trying to “help” food through the blade. A steady rhythm and proper guarding are the safer path—and usually the path to better-looking slices.
For general kitchen hygiene and safe handling, review core guidance from the USDA Food Safety and Inspection Service. When you’re slicing raw proteins, sanitation discipline matters as much as technique.
Cleaning and Maintenance That Preserves Performance
For sanitation principles that apply broadly to food-contact surfaces, the FDA Food Code is a useful reference point.
Common Problems and Quick Fixes
Whenever you’re troubleshooting, treat the slicer like any other powered cutting machine: stop, power off, and unplug before adjusting. Machine-safety concepts translate well from broader guidance like OSHA’s notes on guarding and safe operation practices (OSHA: Meat and Poultry Processing).
When a 750W Slicer Makes Sense (and When It Doesn’t)
In-Stock Picks on Havencia
- 750W Electric Meat Slicer
- Spot AI Hallucinations Fast Checklist | Digital Download Guide on what are ai hallucinations and how to catch them | AI Literacy, Fact-Checking, Prompting Skills
- elegant-art-deco-inspired-crystal-branch-chandelier-for-dining-room
FAQ
Can a 750W electric meat slicer cut frozen meat?
It’s best not to slice fully frozen meat because it can strain the blade and increase the chance of binding or skipping. Instead, partially freeze the meat until it’s firm (not solid), then slice with minimal pressure; if anything jams, power off and unplug before clearing it.
How thin can an electric meat slicer cut?
That depends on the thickness control range, how stable the adjustment is, and how sharp the blade remains. Many slicers can achieve deli-thin results when the food is well-chilled and the blade is clean and sharp.
How should the slicer be cleaned after raw meat?
Unplug the slicer, remove detachable parts, then wash and sanitize food-contact surfaces before drying everything completely. Use separate trays and towels to prevent cross-contamination, and reassemble only when all parts are fully dry.


Leave a comment